")
When it comes to maintaining a lush, healthy lawn, especially on challenging terrains like hills, the sharpness of your mower blades is non-negotiable. At Best Lawn Mower for Hills, we know that dull blades don’t just give your lawn a ragged appearance—they can also strain your mower and shorten its lifespan. If you’ve been wondering how to change riding lawn mower blades, you’re likely dealing with symptoms like frayed grass tips, uneven cuts, or increased fuel consumption. These are all telltale signs that your blades need some TLC. Changing those blades isn’t just a task; it’s an investment in the longevity of your equipment and the health of your lawn. A sharp blade ensures a clean, precise cut, crucial for promoting thick, disease-resistant grass that thrives even on the toughest hills.
How to Change Riding Lawn Mower Blades for Safe and Efficient Mowing
Step 1: Preparing Your Mower for Blade Replacement
Safety First: Disconnecting the Power
The first step is always safety when learning how to change riding lawn mower blades. I make sure to disconnect the spark plug, preventing accidental starts. This is crucial because dealing with sharp blades and a powerful machine requires the utmost caution. Working on a flat, stable surface is also key, and I never forget to wear protective gloves and safety goggles. These small but important steps set the stage for a safe and efficient blade change.
Lifting and Securing Your Mower
Once safety measures are in place, the next step in how to change riding lawn mower blades is lifting and securing the mower. I prefer using a mower jack, but sturdy blocks work too if they’re all you have. The goal here is to elevate the mower enough to access the blades easily, without compromising stability. Engaging the parking brake and chocking the wheels are critical to ensure the mower doesn’t move while you’re working. Proper setup makes the blade change process much smoother and safer.
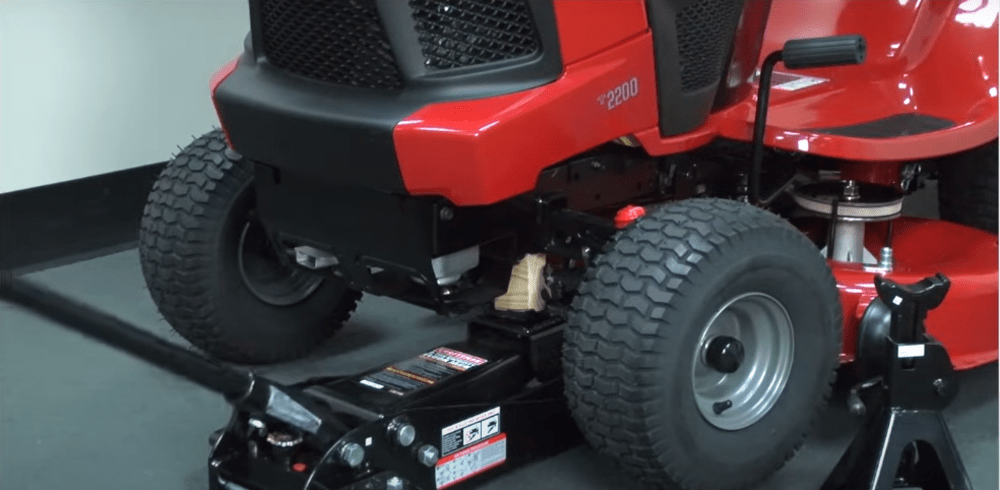
Elevating the mower securely
Step 2: Removing the Old Blades—A Critical Task
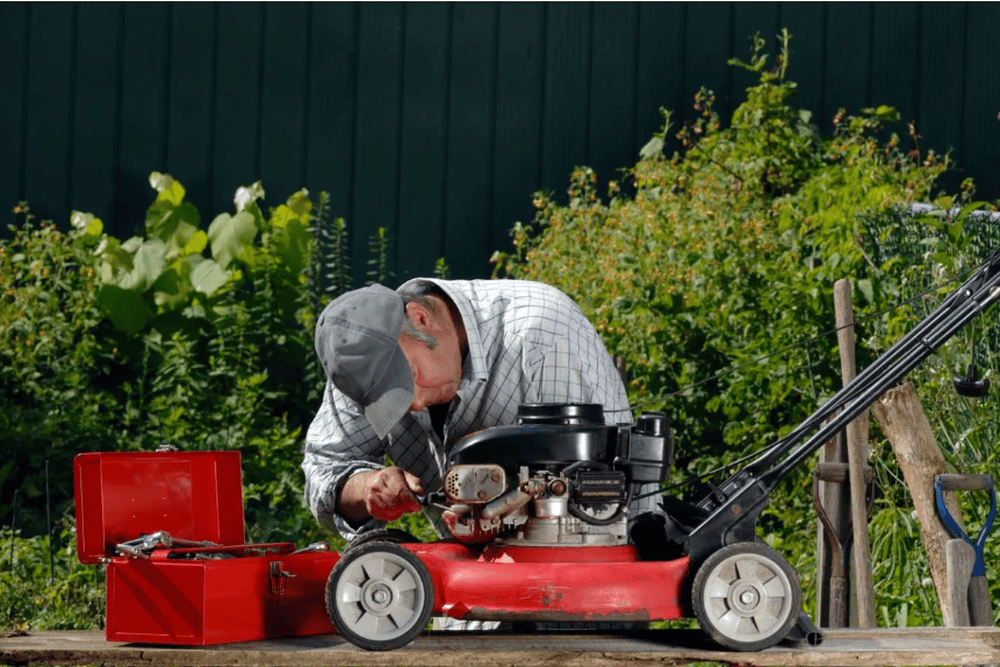
Tools You’ll Need: Getting Everything Ready
Before you dive into the task, gather all the tools needed to change riding lawn mower blades. I always have a socket wrench set, torque wrench, and a blade removal tool ready. A block of wood is essential to stabilize the blade when loosening the bolts. Using the correct size socket wrench is crucial—having everything prepared before starting makes the process quicker and more efficient.
Loosening the Blade Bolts: Patience and Precision
Loosening the blade bolts can be tricky, especially if they’re rusted. If you’re learning how to change riding lawn mower blades, patience is key. I apply a penetrating oil to the bolts and let it sit for a few minutes, which helps loosen them. If they’re still stubborn, a breaker bar provides the extra leverage needed. Taking your time with this step prevents damage to the bolts or the mower’s spindle.
Step 3: Inspecting and Choosing the Right Replacement Blades
Blade Inspection: Is Sharpening an Option?
Before replacing your blades, it’s important to inspect them closely. If you’re wondering how to change riding lawn mower blades, sometimes sharpening is an option. I check for excessive wear or damage—if the blades are in decent shape, a good sharpening might be all they need. However, for significantly worn or damaged blades, replacement is the better choice.
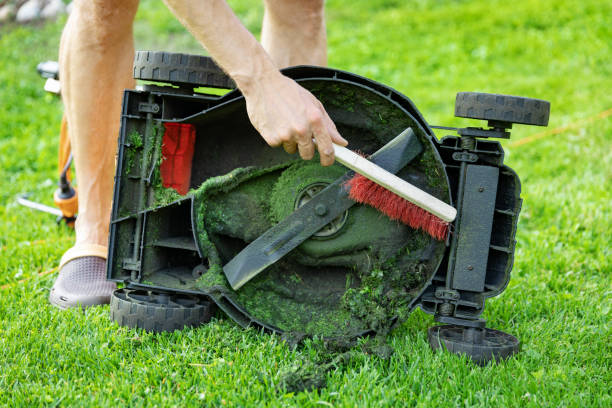
Inspect your mower blades closely
Selecting the Correct Blades: Why It’s Crucial
Choosing the right blades is crucial when you change riding lawn mower blades. I always opt for manufacturer-recommended blades that match the type, size, and material specifications. Incorrect blades can lead to uneven cutting and even damage the mower. Double-checking the mower’s serial number ensures that the blades fit perfectly, which is essential for optimal performance.
Step 4: Installing New Blades with Precision and Care
Positioning the Blades Correctly: Avoid Costly Mistakes
When installing new blades, the correct alignment is crucial. If you’re learning how to change riding lawn mower blades, make sure the cutting edge is facing the right direction. Proper positioning prevents uneven mowing and potential damage to the mower. Ensuring the blades are snug against the spindle with no wobble is a key detail that makes a significant difference.
Tightening to Torque Specifications: Don’t Overdo It
Tightening the blades to the correct torque is a critical step when you change riding lawn mower blades. I use a torque wrench to get it just right—over-tightening can strip the bolts, while under-tightening can cause the blades to come loose. After securing the blades, I check their balance by rotating them by hand to ensure smooth operation.
Step 5: Final Checks and Reassembly—Get Ready to Mow
Double-Check Everything: Safety First
Before lowering the mower, I double-check all my work. Ensuring all bolts are tight and tools are cleared away is crucial when you change riding lawn mower blades. This final safety check is vital for preventing any mishaps during operation.
Reattaching the Mower Deck: A Step Closer to a Perfect Lawn
Reattaching the mower deck requires careful alignment and secure fastening. It’s a straightforward process but essential for ensuring the mower functions correctly after you change the riding lawn mower blades. A well-attached deck leads to an even, professional-looking cut.

Carefully reattach the mower deck for a secure fit
Reconnecting the Spark Plug: The Final Step
The last step in the process of how to change riding lawn mower blades is reconnecting the spark plug. I perform a quick test run to ensure everything is working properly. A brief test mow helps confirm that the blades are cutting cleanly and that the mower is operating smoothly. Once I’m confident everything is in order, I’m ready to tackle the lawn with the assurance that my mower is in top shape.
Expert Advice, Guides, and Recommended Tools
If you’re looking to dive deeper into lawn mower maintenance, including detailed guidance on how to change riding lawn mower blades, the Best Lawn Mower for Hills website is your go-to resource. You’ll find expert articles covering everything from blade sharpening techniques to comprehensive lawn care advice. In addition, the site offers recommendations for the best blades, tools, and other essential equipment needed for your riding lawn mower. Whether you’re a DIY enthusiast or a professional, these guides and product suggestions ensure you have everything necessary to perform maintenance tasks effectively and keep your lawn mower running smoothly. Investing in the right tools and following expert advice not only simplifies the process but also enhances the longevity and performance of your mower.
Best Lawn Mower for Hills—your ultimate resource for mastering lawn mower maintenance and blade changes
Conclusion
Maintaining your riding lawn mower doesn’t stop once you’ve learned how to change riding lawn mower blades. Ongoing upkeep is essential for the longevity of your mower and the health of your lawn. I recommend regularly inspecting the blades for any signs of wear or damage. A quick visual check can tell you a lot—if the blades are chipped or dull, it’s time for sharpening or replacement.
Proper cleaning is just as crucial. After each use, I take a few minutes to clean off any grass clippings or debris from the mower deck and blades. This prevents buildup that can lead to rust and other issues. Establishing a maintenance schedule, where you periodically check and sharpen the blades, change the oil, and inspect other components, will keep your mower in top condition. Remember, a well-maintained mower not only lasts longer but also ensures that your lawn looks its best season after season.